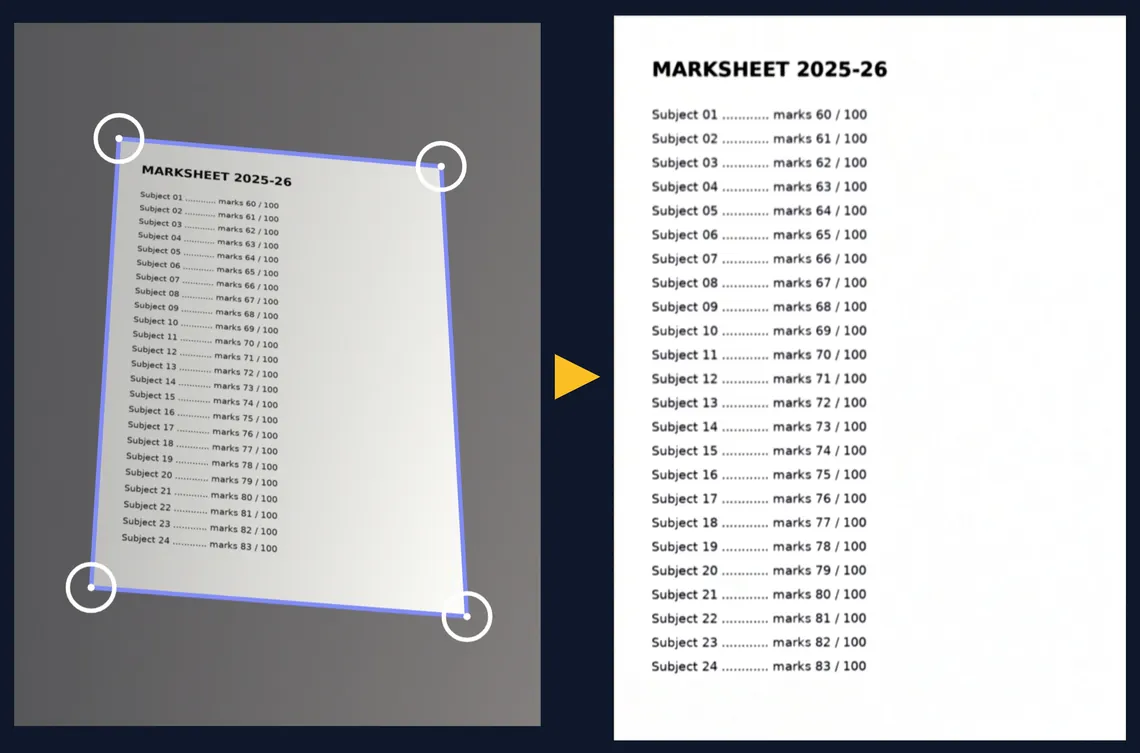
To fix a tilted document photo, use a scanner tool that finds the four corners of the page, flattens it into a straight rectangle and whitens the background. The result prints like a real scan: no table around it, no slant, no grey shadows. In Doczi you can do this in the browser with Fix scan when sending files to a print shop, or in the Doczi AI app when you scan with the camera.
In this guide
Why a crooked photo prints badly
- The table or bed around the page prints as a dark border, eating toner.
- A tilted page prints slanted, and the edges get cut off.
- Grey paper and shadows come out as grey patches.
- Small text looks fuzzy because the page is stretched at an angle.
Shop owners deal with this every day: customers send photos of marksheets taken on the bed at night. One straighten step fixes most of it.
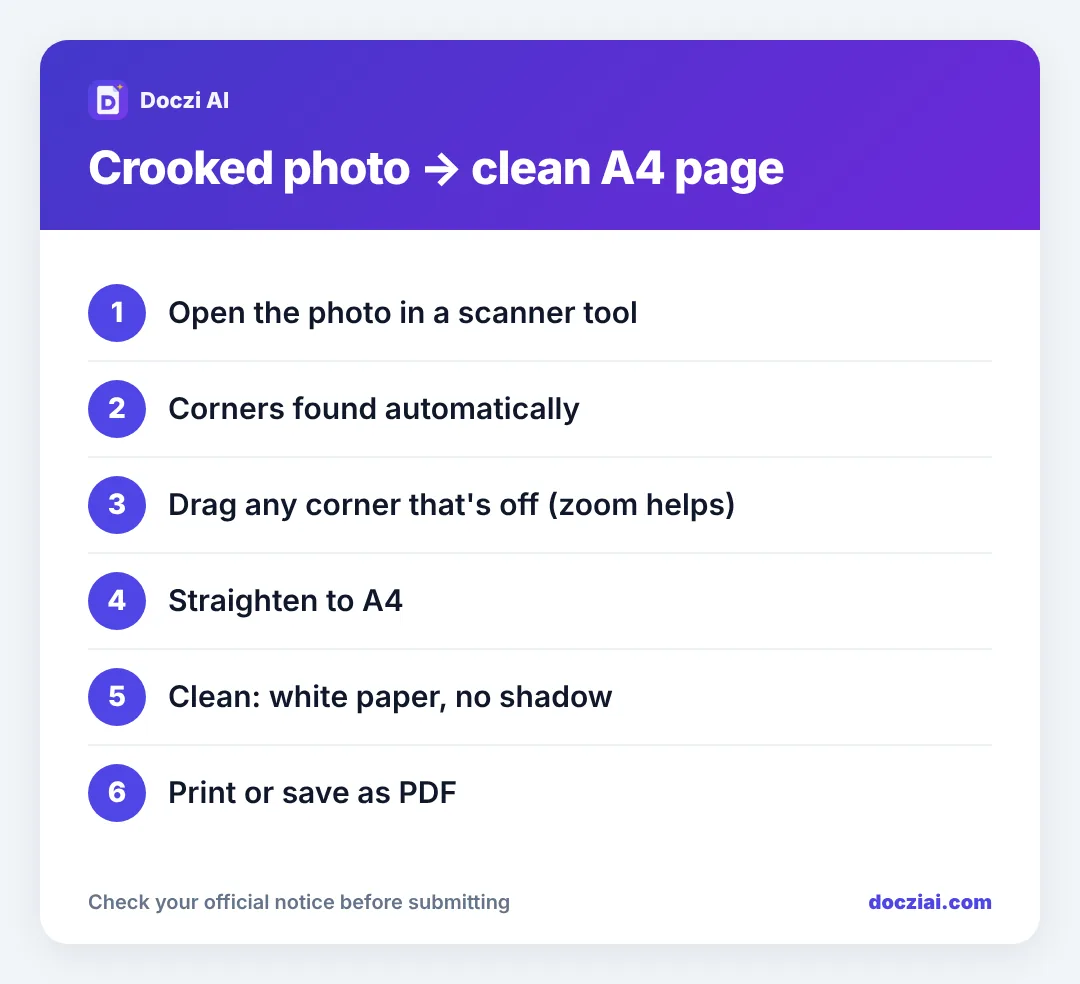
How Fix scan works
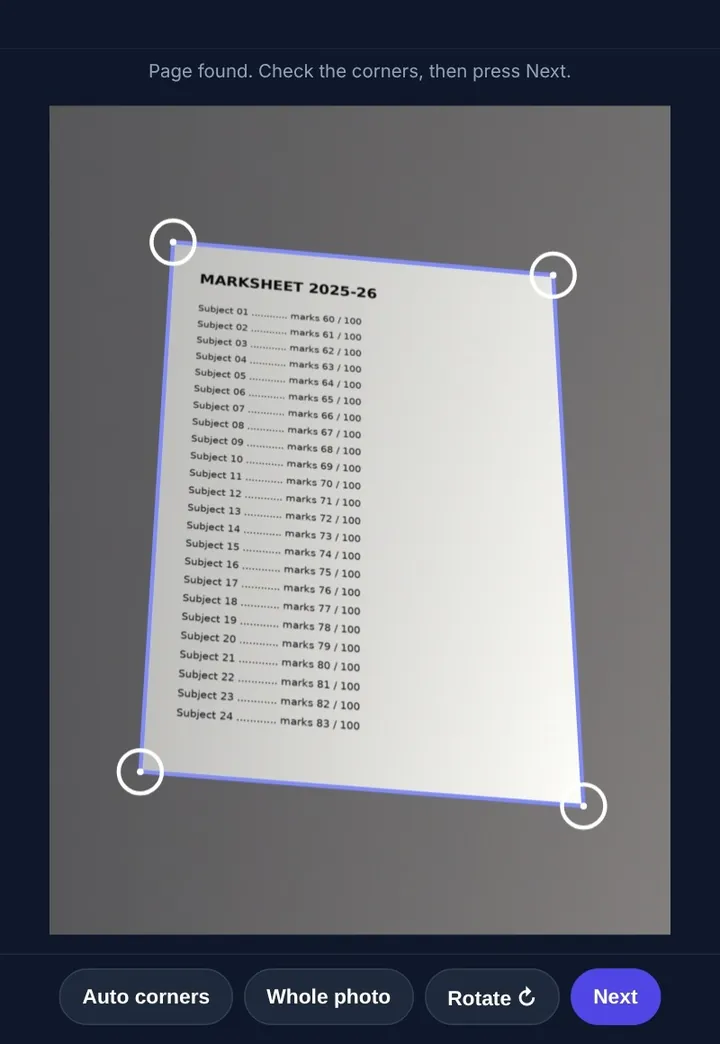
- Corners. It looks for the page’s edges and marks the four corners. On a dark or patterned background it usually finds them on its own.
- Adjust. If a corner is off, drag it. A magnifier appears under your finger so you can place it exactly.
- Straighten. Press Next. The page is flattened into a rectangle, and if it’s close to A4 shape it’s snapped to A4.
- Clean. Choose Clean (white paper, no shadows), Grey, Black & white (sharpest for xerox) or Original.
- Use it. The fixed page replaces the photo, ready to print or send.
Where to find it
- Customers: on a print shop’s Doczi Drop page, after choosing a photo, tap Fix scan before sending. Or use the camera button to open the scanner directly.
- Shop owners: every photo in your inbox has a Fix scan button. Fix it before printing.
- App: the Doczi AI app scans with the camera and does the same cleanup.
When the corners aren’t found
A white page on a white bedsheet has no visible edge, so no tool can find it reliably. Drag the four corners yourself (it takes a few seconds), or retake the photo on a darker surface. Our phone scanning guide has tips for a better first photo.
After fixing: PDF and size
For a form upload rather than printing, turn the fixed page into a PDF with JPG to PDF and fit the limit with Compress PDF. Shops can also press Make one PDF to put all a customer’s fixed pages into one A4 PDF.
Which filter for which document
| Document | Filter |
|---|---|
| Typed letters, forms, notes | Black & white |
| Marksheets with a seal or watermark | Grey or Clean |
| Certificates with a coloured logo or photo | Clean |
| Photos, ID cards, anything with skin tones | Original |
Black & white is sharpest and cheapest to print, but it can turn a faint seal into a black blob. When in doubt, check the preview of each filter; it only takes a tap. Printing the result? See the printing checklist.
FAQs
Does Fix scan upload my photo anywhere?
No. It runs in the browser on your device.
Which filter is best for printing on a xerox machine?
Black & white gives the sharpest text and uses the least toner. Use Clean or Original for documents with colour seals or photos.
Can it fix a photo of a curved book page?
It straightens flat pages. A strongly curved book page will still look a bit curved; press it flat before taking the photo.
Can I rotate the page?
Yes, there’s a rotate button in one tap.